Little Sailor Girl, Finale

The knitting went ‘round and ‘round.  I’m not entirely sure why one of the smallest elements of the sweater seemed to take the longest.

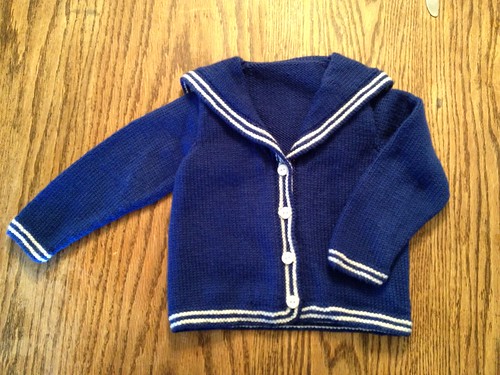
Now that the striped garter stitch edging is cast off, I must admit that I am very glad I decided to knit it on rather than sew it on as called for in the pattern.  By picking up and knitting the stitches I was able to switch directions at the collar turning, which allows the striping to be right-side out on the collar as well as the body of the sweater.  It also saved me from going loony trying to sew the edging on, trying to make the corners match up correctly with the corners of the sweater.   I am quite proud of how my corners turned out; they’re nice and corner-y, gently rounded rather than wonky, which is how I was afraid they’d turn out.

Sewing on the sleeves went pretty much the same way the whole sweater has.  The armseye seemed to be a little bit bigger than the sleeve cap, so I knew the easing in of the set-in sleeve would involve a lot of easing. Thankfully, there were a couple of points that needed to match up, which made figuring out how much sleeve there was compared to armseye easier.  I had to redo the seaming on the first half of the first sleeve 3 times.  In the end, I determined that a 1 sleeve stitch to 2 armseye rows until reaching the armseye decreases would be what was going to work rather than doing the standard 3 sleeve stitches to 4 armseye rows ratio.  This made the second sleeve go much faster.  The underarm seam seemed easy-peasy in comparison.

Little Sailor Girl, Part 5

The end is so close.  All that’s left is stitching on the sleeves and knitting on the striped border.

Originally, the border was supposed to be knit in a big long strip and sewn on at the end.  Personally, I just thought that was stupid, especially because sewing on the border causes the portion of the border that goes up and around the collar to be reverse and not look as nice.  I picked up the stitches from the provisional cast on I did, then picked up stitches up the front using the 3 stitches to 4 rows method.  When I got to where the collar folds over, I switched the picking up so it left the pick up seam to the back.  I’ve put stitch markers in place to show the divisions between back and sides, front corners, where the collar switches from the body, and the corners of the back collar flap.  The most important ones being the corners (so I know where to do corner increases) and the collar markers (so I know to switch from purling to knitting or vice versa).

At least it only took me 4 tries to work out the buttonhole placement.  *sigh*

Little Sailor Girl, Part 4

Little Sailor Girl’s sleeves were relatively easy.  I knit both at the same time to ensure they were the same length and the like.  Then, I had to rip one of them back to the end of the increase section because I had dropped a stitch and left it behind for 6 inches.  So, I finished the sleeve that was good to clear it off the needle before ripping back on the other.

I washed and gently blocked the body as I was finishing the sleeves so that it would be ready for the next step.  And here is where I must say that I am quite proud of myself.  🙂  Because I had the shoulders and the neckline to join together, I decided to do it all together.  (And here is where I say I regret not just picking up the collar stitches from the back’s neckline to prevent one more seam, and I think it would probably lay a bit better.)  I used snipettes of waste yarn to tie together the shoulders at 3 matching points – beginning of shoulder, middle of should where the second cast off section began (i.e., the step of the shoulder), and the end of the should at the neckline.  I found the center of the cast on collar stitches and the center of the cast off back neck line stitches, and taking a long piece of matching yarn, used half the yarn to stitch on half of the seam and the other half of the yarn to do the second half of the seam.  So what, you’re thinking, it’s a woven seam.  Yes, but this one changed right sides twice and the center section joined right side of stockinette stitch to reverse stockinette.  *dance of celebration*

So, body is joined together and the sleeves are gently blocking.  Next is the border… oh, border.

Little Sailor Girl, Part 3

Where were we in our saga?  Ah, yes, fronts done up to the end of the short row instructions.  The next bit was casting on for the back of the neck, which the instructions have you do separately for each side.  What I did was cast on both sides worth of stitches altogether, joining both sides into one piece.  I still really have to wonder why the pattern does not have you do it that way.

The flap is a nice straightforward knit till it’s the right length bit of this pattern.  There was a moment of panic as I reached the correct length and showed my progress off to The Husband.  I was trying to show him how the collar would sit and somehow managed to convince myself that I had twisted the collar when I cast on the back of the neck and joined the two pieces.  Thankfully, he convinced me to put it down and look at it again in the light of morning.  The next morning I realized I had been trying to label a shoulder as the collar and that got me all turned around.  I put the live stitches at the bottom of the back collar flap onto waste yarn for the garter stitch striped edging.

The back was the last part of the main body of the sweater for me to knit, and I finished it without incident.  Of course, once I cast it off at the back of the neck, it dawned on me that perhaps I should have done the back before completing the collar pieces as I could have simply picked up the back flap stitches rather than casting them on.  Now I will need to seam across the entire shoulder/neck area.  It will either help lend structure to the sweater or it will look funny; only one way to find out.

Little Sailor Girl, Part 2

Oh, Little Sailor Girl…

I had knit a good portion of the bottom of the sweater (about 6 inches) when Tour de Fleece started.  So, the sweater was put aside while I worked on my spinning and then my Ravellenic Games knitting.

Labor Day weekend I pulled it out again.  I figured out how much the garter stitch striped edging would measure, and subtracted that from what the total length was supposed to be before beginning the armhole shaping.  Because I had cast on the sweater as one whole piece, I started with the right side for the next part of the pattern.

As you start the armhole shaping, you also start the collar shaping, which is a folded over portion of a sort of shawl collar that becomes the back flap (Is there a better name for that, does anyone know?).  Because the collar is folded over and shows stockinette stitch on the front, it gets purled on the right side of the piece.  Does the pattern mention this?  Not really.  Now I knew, because I could easily see that from the pattern photos, but did that stop me from somehow screwing up the increases in such a way that it looked like garter stitch? No.

I ripped it out and started the shaping section again, this time using a Pfb to increase.  I also switch the k2tog decreases to ssk along where the collar joins the body to get a left-leaning look.  I kept the k2tog for the armhole decreases since those should lean to the right.  Then, I find the first of several pattern mistakes.  At least I hope it was a mistake; I haven’t figure out why the pattern would suddenly have you K the collar stitches on the right side of the piece when you’ve been purling them up to that point.  The same mistake was in the instructions for the left front as well.  (At this point, yes, I went looking for errata and found none.)

The collar progressed nicely once I got to the part that just has you continue without anymore increases or decreases till it’s a certain length.  Then, the shoulder shaping was pretty straightforward.  The next step is some short row shaping on the collar, which was written out alright except for the part where it doesn’t tell you to pick up and knit the wraps when you go back over all the stitches.  This would explain why there are a few of these sweaters on Ravelry that looked like there was something odd going on with the collar at this point; wraps were probably left unknit.

At this point I put the stitches on waste yarn and went to the left front, which went smoother after figuring out the eccentricities of the right side instructions.

Little Sailor Girl, Part 1

Oh, Little Sailor Girl, are you trying to send me off the deep end?

Some background…  This is a pattern that my sister saw a sample knit of in her local LYS/fabric/craft store.  My brother-in-law being in the Navy, she thought this would be a fantastic sweater for my niece.  So, she and my mom called me up and persuaded me to knit an awesomely cute sweater for my awesomely cute niece.  Once I was onboard, my mom bought the pattern booklet and brought it home with her to hand off to me to knit for my niece’s birthday, which is in October.

I did a cursory glance over the pattern and determined that knitting a sweater for a child-who-will-outgrow-it-probably-quicker-than-I-can-blink out of the merino/cashmere/silk yarn used in the pattern was ridiculous to the point that I think I may have actually laughed out loud.  What two-year-old needs a merino/cashmere/silk sweater?  Really?  So, a trip in March to Purlescence Yarns had me swapping out the called for yarn with Cascade 220 Superwash in a bright blue with a pure white for the stripe. 


In June, I sat down to get started on the sweater to give myself plenty of time to get the sweater done.  I took a look at other knitters’ versions on Ravelry and began to get the sense that something was wrong with the pattern.  The major problem seemed to be that the cute little sailor flap on the back of the sweater is knit in two parts and seamed up the middle; this is not something you can tell from the pattern pictures as none of them are shot from the back.  I think the average person seeing the pattern photos would assume that the flap is one piece; I know I did.  The idea of a seam running down the middle of it just didn’t appeal.  No worries, several people had made modifications to eliminate the seam and it sounded easy enough to do.

I read the pattern through and found myself reading parts over and over again because they were confusing, and while the words were in English, they almost seemed to not be strung together in a recognizable order.  I got things sorted out by realizing that the pattern called for you to cast on the striped edging for the bottom of the fronts, up along the button bands, along the collar, and around the back flap for each side; you then cast off all but the bottom of the front portion.  The back is not as complicated, just calling for the striped section at the bottom of the back.  I cannot for the life of me figure out why they would have you knit the entire length of the stripe, then have you stitch it on.  Picking up and knitting the stitches seems so much easier of an idea.

So, the sweater was cast one, back and fronts all in one piece, with a provisional cast-on for picking up the edging stitches later.

End of the Line, Temporarily

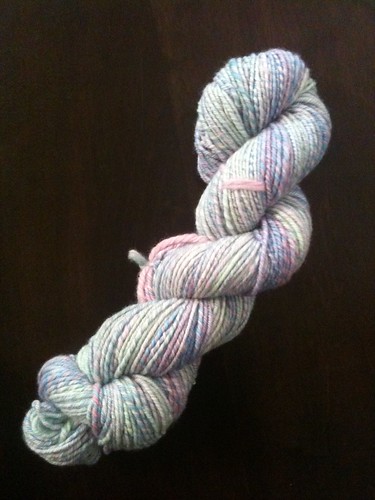
My niece’s first birthday is next month, and I had decided to knit her a sweater made from my handspun.  Because my sister knows how to take care of nice things, I decided that I wasn’t restricted to just superwash fibers.  I selected the organic merino I got in the Spunky Eclectic club in March 2011; the colorway is Little Periwinkles, which is pastels — pink, blue, green, purple with some white.  For the pattern, I choose Elizabeth Zimmerman’s February Baby Sweater from The Knitting Almanac.  It’s pretty much seamless, with some lace to make it pretty.

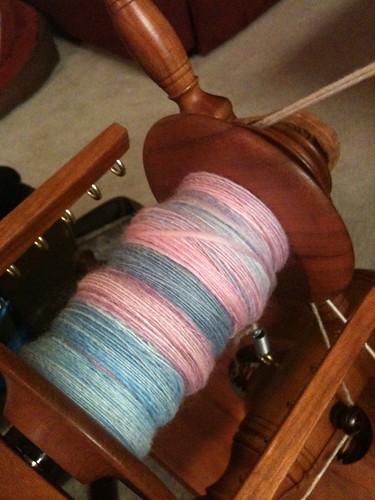
I started by spinning up 4 oz, which gave me approximately 194 yards of light worsted yarn.  I used about 30 yards knitting a swatch to determine which needle size would be best for the yarn and get me the closest to the gauge listed in the pattern (5 sts/inch).  I tested out size 5, 6, and 7 needles.  It was hard waiting for the swatch to dry, but in the end it told me that I could get 5 sts/inch on size 6 needles.  However, I liked the fabric from the size 7 needles better, and the gauge was only 4.8 sts/inch; close enough, and would allow me to err on the bigger size for the sweater since Miss M is growing quickly.

Unfortunately, the 160-ish yards I had left were not enough to complete the sweater. I got through the yoke, the arm separation, and about 3 inches of the body before I ran out. So, it’s back to the spinning wheel for me to get more yarn for finishing up. I’ve gotten the 4 bobbins of singles done and am just waiting for them to rest a little before getting the plying started.

I must say, the organic merino is a dream to spin. I have more of it in different colors from Spunky Eclectic and am now looking forward to spinning and knitting it up. So soft.

All Baby Things, All the Time

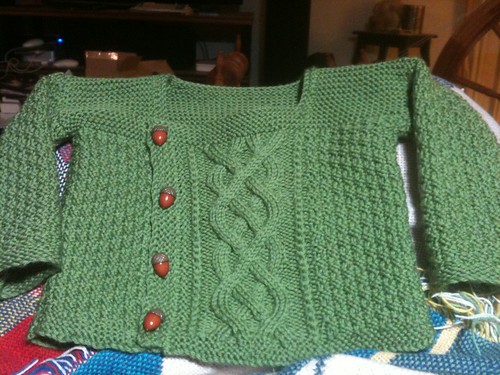
After finishing the baby blanket for my sister, I had to put my energy towards knitting baby things for a couple of friends who were due within a couple months of each other.  My friend Katy is really into forests and fairies, so I wanted to make her a baby sweater that invoked those ideas.  I settled on the Baby Yours sweater by Stephanie Pearl-McPhee and published by Blue Moon Fiber Arts.  It was a relatively easy knit, mostly moss stitch with a cable up the middle of the back and front.  The only thing that tripped me up was that the centimeter measurements were listed before the inch measurements, so I just need to make sure I read the correct instructions as I went (or really, just measure the sweater in centimeters instead of inches, which is mostly what I did).

Picking out buttons was slightly difficult because I wanted something that went really well with the pattern.  I picked up some ivy leaf buttons and some acorns.  I tested out how well each of the button designs would fit through the buttonholes I made.  The ivy leaves had three pointy bits, which made it difficult to get through the holes.  At first, the acorns didn’t seem to fit, but with a little coaxing I got them through.  They looked so cute and really matched the feel of the sweater.

Baby gifts and socks

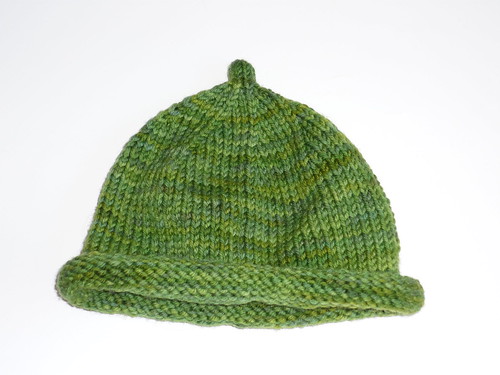
Just a quick post to show off a few finished items.  They’ve been finished for awhile, but I had to get the photos off my camera, which took great effort.  First up are the baby gifts I knit for my friend — a simple roll-brimmed hat and the Little Sky socks from New Pathways for Sock Knitters.

They were all knit out of Dream in Color Classy in the Happy Forest colorway.  I really like the way the yarn softened up when I washed it.  A sweater out of Classy would be really nice, and I’m remembering seeing one of the new semi-solids from DiC in a pretty, chocolaty brown.

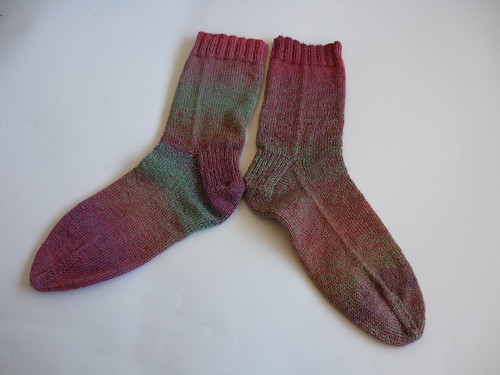
Next up is the pair of socks I knit my mother for her birthday/Mother’s Day gift.

They are knit out of Jojoland Melody Superwash.  They took 2 skeins, and I thought it was interesting just how different in striping the 2 skeins turned out to be.

Looking for opinions

So, I’m knitting up a tiny preemie cardigan.  And I’ve already knit a hat and booties in normal baby size.  But, now I’m realizing that a yarn I have in my stash that I didn’t originally use for a baby gift because I thought it was not superwash may indeed be superwash — Lisa Souza Merino Hardtwist in Spumoni.  (For some reason, the skein I have is a completely different color from the Spumoni on Lisa’s website.  Mine’s a yellow, green and pink mix while the one on her website is teal, grey, and purple…. weird.)  This is why I’m thinking my skein may not be superwash if something changed along the way.  It’s a skein I picked up at a yarn swap in January, so my memory is a little foggy about it, and it’s at home and I’m still at work (*shhh*).

Anyway, if my skein does turn out to be superwash, I thought it would be nice to knit my friend a normal sized baby sweater as the little girl won’t be preemie sized forever.  I’ve knit EZ’s Baby Surprise Jacket once before and thought it was a great, fast knit.  But, now I’m also considering EZ’s Feburary Baby Sweater to make things exciting with a little lace.  I am flip-flopping between the two.  Thankfully, this isn’t a rush.  i’ve got the hat and booties and the preemie cardigan should be done quickly (which is good because I believe my friend may be coming to a work potluck on Tues. and I could give them to her then).

So… opinions.  Should I go with the magic that is the BSJ?  Or should I try something new and knit the February Baby Sweater?